BIOS
Dari Wikipedia bahasa Indonesia, ensiklopedia bebas
BIOS, singkatan dari
Basic
Input
Output
System, dalam sistem komputer
IBM PC atau kompatibelnya (komputer yang berbasis keluarga prosesor
Intel x86) merujuk kepada kumpulan rutin perangkat lunak yang mampu melakukan hal-hal berikut:
- Inisialisasi (penyalaan) serta pengujian terhadap perangkat keras (dalam proses yang disebut dengan Power On Self Test, POST)
- Memuat dan menjalankan sistem operasi
- Mengatur beberapa konfigurasi dasar dalam komputer (tanggal, waktu, konfigurasi media penyimpanan, konfigurasi proses booting, kinerja, serta kestabilan komputer)
- Membantu sistem operasi dan aplikasi dalam proses pengaturan perangkat keras dengan menggunakan BIOS Runtime Services.
BIOS menyediakan antarmuka komunikasi tingkat rendah, dan dapat mengendalikan banyak jenis perangkat keras (seperti keyboard). Karena kedekatannya dengan perangkat keras, BIOS umumnya dibuat dengan menggunakan
bahasa rakitan (
assembly) yang digunakan oleh mesin yang bersangkutan.
Istilah
BIOS pertama kali muncul dalam sistem operasi
CP/M, yang merupakan bagian dari CP/M yang dimuat pada saat
proses booting dimulai yang berhadapan secara langsung dengan
perangkat keras (beberapa mesin yang menjalankan CP/M memiliki
boot loader sederhana dalam
ROM). Kebanyakan versi DOS memiliki sebuah
berkas yang disebut "IBMBIO.COM" (
IBM PC-DOS) atau "IO.SYS" (
MS-DOS) yang berfungsi sama seperti halnya
CP/M disk BIOS.
Kata BIOS juga dapat diartikan sebagai "kehidupan" dalam tulisan Yunani (Βίος).
[sunting] Komponen BIOS
Dalam BIOS, terdapat beberapa komponen dasar, yakni sebagai berikut:
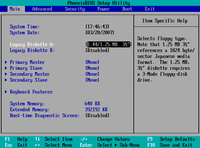
Contoh dari CMOS Setup (Phoenix BIOS)
- Program BIOS Setup yang memungkinkan pengguna untuk mengubah konfigurasi komputer (tipe harddisk, disk drive, manajemen daya listrik, kinerja komputer, dll) sesuai keinginan. BIOS menyembunyikan detail-detail cara pengaksesan perangkat keras yang cukup rumit apabila dilakukan secara langsung.
- Driver untuk perangkat-perangkat keras dasar, seperti video adapter, perangkat input, prosesor, dan beberapa perangkat lainnya untuk sistem operasi dasar 16-bit (dalam hal ini adalah keluarga DOS).
- Program bootstraper utama yang memungkinkan komputer dapat melakukan proses booting ke dalam sistem operasi yang terpasang.
[sunting] ROM dan NVRAM
BIOS juga sering disebut sebagai
ROM BIOS karena pada awalnya BIOS disimpan dalam chip
memori hanya baca (ROM) dalam motherboard. Mengapa disimpan di dalam ROM, adalah agar BIOS dapat dieksekusi pada waktu komputer dinyalakan, tanpa harus menunggu untuk menyalakan perangkat media penyipanan terlebih dahulu (yang memakan waktu lama). BIOS dalam komputer PC modern disimpan dalam chip
ROM yang dapat ditulisi ulang secara elektrik atau Flash ROM. Karena itulah, sekarang sebutan
Flash BIOS lebih populer dibandingkan dengan
ROM BIOS. Berikut ini adalah beberapa chip ROM yang digunakan sebagai tempat penyimpanan BIOS.
| Tipe ROM | Cara penulisan | Dapat dihapus | Jenis BIOS |
| Mask ROM | Photolithography | Tidak | ROM BIOS |
| Programmable ROM (PROM) | PROM Writer | Tidak | ROM BIOS |
| Erasable PROM | EPROM/PROM Writer | Ya, dengan menggunakan EPROM Rewriter atau menyinarinya dengan sinar ultraviolet tepat pada lubang kuarsa bening. | ROM BIOS |
| Electricly EPROM | EEPROM/EPROM/PROM Writer | Ya, dengan menggunakan EEPROM Rewriter, atau secara langsung secara elektrik dari papan sirkuit dengan menggunakan perangkat lunak EEPROM Programmer. | ROM BIOS |
| Flash ROM | EEPROM Writer atau software yang dapat menulisi Flash ROM | Ya, dengan menggunakan EEPROM Writer, atau langsung secara elektrik dari papan sirkuit dengan menggunakan perangkat lunak Flash BIOS Programmer. | Flash BIOS |

Tampilan yang dikeluarkan oleh BIOS saat
NVRAM mengalami kerusakan atau saat baterai
litium CR-2032 habis dayanya atau dicabut dari slotnya
Meskipun BIOS disimpan dalam
memori hanya baca, konfigurasi BIOS tidak disimpan dalam ROM, (hal ini disebabkan oleh sifat ROM yang statis) melainkan sebuah chip terpisah yang disebut sebagai
Real-time clock (RTC), yang berupa sebuah
Non-Volatile Random Access Memory (NVRAM). NVRAM juga sering disebut sebagai
Complimentary Metal-Oxide Random Access Memory (CMOS RAM), karena menggunakan metode pembuatan CMOS. Karena menggunakan metode pembuatan CMOS, NVRAM membutuhkan daya yang sangat kecil agar dapat bekerja. Meskipun disebut
non-volatile, NVRAM sebenarnya merupakan sebuah
chip yang
volatile, sehingga data yang tersimpan di dalamnya dapat terhapus dengan mudah jika daya listrik yang menghidupinya terputus. Oleh karena itu, NVRAM "dihidupi" oleh sebuah
baterai (mirip baterai
kalkulator atau jam) dengan bahan
Litium dengan seri
CR-2032. Sebuah baterai Litium CR-2032 dapat menghidupi NVRAM selama tiga hingga lima tahun. Jika daya dalam baterai habis, atau daya yang disuplainya terputus (akibat dicabut dari slotnya), maka semua konfigurasi akan dikembalikan ke kondisi standar, sesuai ketika BIOS tersebut diprogram oleh pabrikan. BIOS umumnya memberikan laporan
CMOS Checksum Error atau
NVRAM Checksum Error.
=BIOS, singkatan dari Basic Input Output System, dalam sistem komputer IBM PC atau kompatibelnya (komputer yang berbasis keluarga prosesor Intel x86) merujuk kepada kumpulan rutin perangkat lunak yang mampu melakukan hal-hal berikut:
1. Inisialisasi (penyalaan) serta pengujian terhadap perangkat keras (dalam proses yang disebut dengan Power On Self Test, POST)
  2. Memuat dan menjalankan sistem operasi
  3. Mengatur beberapa konfigurasi dasar dalam komputer (tanggal, waktu, konfigurasi media penyimpanan, konfigurasi proses booting, kinerja, serta kestabilan komputer)
  4. Membantu sistem operasi dan aplikasi dalam proses pengaturan perangkat keras dengan menggunakan BIOS Runtime Services.
BIOS menyediakan antarmuka komunikasi tingkat rendah, dan dapat mengendalikan banyak jenis perangkat keras (seperti keyboard). Karena kedekatannya dengan perangkat keras, BIOS umumnya dibuat dengan menggunakan bahasa rakitan (assembly) yang digunakan oleh mesin yang bersangkutan.
Istilah BIOS pertama kali muncul dalam sistem operasi CP/M, yang merupakan bagian dari CP/M yang dimuat pada saat proses booting dimulai yang berhadapan secara langsung dengan perangkat keras (beberapa mesin yang menjalankan CP/M memiliki boot loader sederhana dalam ROM). Kebanyakan versi DOS memiliki sebuah berkas yang disebut "IBMBIO.COM" (IBM PC-DOS) atau "IO.SYS" (MS-DOS) yang berfungsi sama seperti halnya CP/M disk BIOS.
Kata BIOS juga dapat diartikan sebagai "kehidupan" dalam tulisan Yunani (Βίος).
Komponen BIOS
Dalam BIOS, terdapat beberapa komponen dasar, yakni sebagai berikut: Contoh dari CMOS Setup (Phoenix BIOS)
* Program BIOS Setup yang memungkinkan pengguna untuk mengubah konfigurasi komputer (tipe harddisk, disk drive, manajemen daya listrik, kinerja komputer, dll) sesuai keinginan. BIOS menyembunyikan detail-detail cara pengaksesan perangkat keras yang cukup rumit apabila dilakukan secara langsung.
   * Driver untuk perangkat-perangkat keras dasar, seperti video adapter, perangkat input, prosesor, dan beberapa perangkat lainnya untuk sistem operasi dasar 16-bit (dalam hal ini adalah keluarga DOS).
BIOS
From Wikipedia, the free encyclopedia
In
IBM PC Compatible computers, the
basic input/output system (BIOS), also known as the
System BIOS, is a
de facto standard defining a
firmware interface.
[1]
The BIOS software is built into the PC, and is the first code run by a
PC when powered on ('boot firmware'). The primary function of the BIOS is to load and start an
operating system. When the PC starts up, the first job for the BIOS is to initialize and identify system devices such as the
video display card, keyboard and mouse,
hard disk, CD/DVD drive and other hardware. The BIOS then locates software held on a peripheral device (designated as a 'boot device'), such as a hard disk or a CD, and loads and executes that software, giving it control of the PC.
[2] This process is known as
booting, or booting up, which is short for
bootstrapping.
BIOS software is stored on a
non-volatile ROM chip built into the system on the
mother board. The BIOS software is specifically designed to work with the particular type of system in question, including having a knowledge of the workings of various devices that make up the complementary chipset of the system. In modern computer systems, the
BIOS chip's contents can be rewritten allowing BIOS software to be upgraded.
A BIOS will also have a
user interface (or UI for short). Typically this is a menu system accessed by pressing a certain key on the keyboard when the PC starts. In the BIOS UI, a user can:
- configure hardware
- set the system clock
- enable or disable system components
- select which devices are eligible to be a potential boot device
- set various password prompts, such as a password for securing access to the BIOS UI functions itself and preventing malicious users from booting the system from unauthorized peripheral devices.
The BIOS provides a small library of basic input/output functions used to operate and control the peripherals such as the keyboard, text display functions and so forth, and these software library functions are callable by external software. In the IBM PC and AT, certain peripheral cards such as hard-drive controllers and video display adapters carried their own BIOS extension
ROM, which provided additional functionality.
Operating systems and executive software, designed to supersede this basic firmware functionality, will provide replacement software interfaces to applications.
The
role of the BIOS has changed over time; today BIOS is a legacy system, superseded by the more complex
Extensible Firmware Interface (EFI), but BIOS remains in widespread use, and EFI booting has only been supported in 64-bit
x86 Windows since 2008. BIOS is primarily associated with the 16-bit, 32-bit, and the beginning of the 64-bit architecture eras, while EFI is used for some newer 32-bit and 64-bit architectures. Today BIOS is primarily used for booting a system, and for certain additional features such as power management (
ACPI), video initialization (in
X.org); but otherwise is not used during the ordinary running of a system, while in early systems (particularly in the 16-bit era), BIOS was used for hardware access – operating systems (notably
MS-DOS) would call the BIOS rather than directly accessing the hardware. In the 32-bit era and later, operating systems instead generally directly accessed the hardware using their own
device drivers. However, the distinction between BIOS and EFI is rarely made in terminology by the average computer user, making BIOS a catch-all term for both systems.
[edit] Terminology
The term first appeared in the
CP/M operating system, describing the part of CP/M loaded during boot time that interfaced directly with the
hardware (CP/M machines usually had only a simple
boot loader in their
ROM). Most versions of
DOS have a file called "
IBMBIO.COM" or "
IO.SYS" that is analogous to the CP/M BIOS.
Among other classes of computers, the generic terms
boot monitor,
boot loader or
boot ROM were commonly used. Some Sun and PowerPC-based computers use
Open Firmware for this purpose. There are a few alternatives for Legacy BIOS in the x86 world:
Extensible Firmware Interface,
Open Firmware (used on the
OLPC XO-1) and
coreboot.
[edit] IBM PC-compatible BIOS chips
In principle, the BIOS in ROM was customized to the particular manufacturer's hardware, allowing low-level services (such as reading a keystroke or writing a sector of data to diskette) to be provided in a standardized way to the operating system. For example, an IBM PC might have had either a monochrome or a color display adapter, using different display memory addresses and hardware - but the BIOS service to print a character on the screen in text mode would be the same.
| Boot Block |
| DMI Block |
| Main Block |
|
 PhoenixBIOS D686. This BIOS chip is housed in a PLCC package, which is, in turn, plugged into a PLCC socket. |
Prior to the early 1990s,
BIOSes were stored in
ROM or
PROM chips, which could not be altered by users. As its complexity and need for updates grew, and re-programmable parts became more available, BIOS firmware was most commonly stored on
EEPROM or
flash memory devices. According to Robert Braver, the president of the BIOS manufacturer Micro Firmware,
Flash BIOS chips became common around 1995 because the electrically erasable PROM (EEPROM) chips are cheaper and easier to program than standard erasable PROM (
EPROM) chips. EPROM chips may be erased by prolonged exposure to ultraviolet light, which accessed the chip via the window. Chip manufacturers use EPROM programmers (blasters) to program EPROM chips. Electrically erasable (EEPROM) chips come with the additional feature of allowing a BIOS reprogramming via higher-than-normal amounts of voltage.
[3] BIOS versions are upgraded to take advantage of newer versions of hardware and to correct bugs in previous revisions of BIOSes.
[4]
Beginning with the IBM AT, PCs supported a hardware clock settable through BIOS. It had a century bit which allowed for manually changing the century when the year 2000 happened. Most BIOS revisions created in 1995 and nearly all BIOS revisions in 1997 supported
the year 2000 by setting the century bit automatically when the clock rolled past midnight, December 31, 1999.
[5]
The first flash chips were attached to the
ISA bus. Starting in 1997, the BIOS flash moved to the
LPC bus, a functional replacement for ISA, following a new standard implementation known as "firmware hub" (FWH). In 2006, the first systems supporting a
Serial Peripheral Interface (SPI) appeared, and the BIOS flash moved again.
The size of the BIOS, and the capacities of the ROM, EEPROM and other media it may be stored on, has increased over time as new features have been added to the code; BIOS versions now exist with sizes up to 16 megabytes. Some modern motherboards are including even bigger NAND
Flash ROM ICs on board which are capable of storing whole compact operating system distribution like some
Linux distributions. For example, some recent ASUS motherboards included
SplashTop Linux embedded into their NAND
Flash ROM ICs.
[edit] Flashing the BIOS
In modern PCs the BIOS is stored in
rewritable memory, allowing the contents to be replaced or 'rewritten'. This rewriting of the contents is sometimes termed
'flashing'. This is done by a special program, usually provided by the system's manufacturer. A file containing such contents is sometimes termed 'a BIOS image'. A BIOS might be reflashed in order to upgrade to a newer version to fix bugs or provide improved performance or to support newer hardware, or a reflashing operation might be needed to fix a damaged BIOS.
[edit] BIOS chip vulnerabilities
EEPROM chips are advantageous because they can be easily updated by the user; hardware manufacturers frequently issue BIOS updates to upgrade their products, improve compatibility and remove
bugs. However, this advantage had the risk that an improperly executed or aborted BIOS update could render the computer or device unusable. To avoid these situations, more recent BIOSes use a "boot block"; a portion of the BIOS which runs first and must be updated separately. This code verifies if the rest of the BIOS is intact (using
hash checksums or other methods) before transferring control to it. If the boot block detects any corruption in the main BIOS, it will typically warn the user that a recovery process must be initiated by booting from
removable media (floppy, CD or USB memory) so the user can try flashing the BIOS again. Some
motherboards have a
backup BIOS (sometimes referred to as DualBIOS boards) to recover from BIOS corruptions.
[edit] Overclocking
Some BIOS chips allow
overclocking, an action in which the
CPU is adjusted to a higher
clock rate than its factory preset. Overclocking may, however, seriously compromise system reliability in insufficiently cooled computers and generally shorten component lifespan.
[edit] Virus attacks
There are at least three known BIOS attack viruses, two of which were for demonstration purposes.
The first was a virus which was able to erase Flash ROM BIOS content, rendering computer systems unstable.
CIH, also known as "
Chernobyl Virus", appeared for the first time in mid-1998 and became active in April 1999. It affected systems' BIOS's and often they could not be fixed on their own since they were no longer able to boot at all. To repair this, Flash ROM IC had to be removed from the motherboard to be reprogrammed elsewhere. Damage from CIH was possible since the virus was specifically targeted at the then widespread Intel i430TX motherboard chipset, and the most common operating systems of the time were based on the
Windows 9x family allowing direct hardware access to all programs.
Modern systems are not vulnerable to CIH because of a variety of chipsets being used which are incompatible with the Intel i430TX chipset, and also other Flash ROM IC types. There is also extra protection from accidental BIOS rewrites in the form of boot blocks which are protected from accidental overwrite or dual and quad BIOS equipped systems which may, in the event of a crash, use a backup BIOS. Also, all modern operating systems like
Linux,
Mac OS X,
Windows NT-based Windows OS like
Windows 2000,
Windows XP and newer, do not allow user mode programs to have direct hardware access. As a result, as of 2008, CIH has become essentially harmless, at worst causing annoyance by infecting executable files and triggering alerts from antivirus software. Other BIOS viruses remain possible, however
[6]: since most Windows users run all applications with administrative privileges, a modern CIH-like virus could in principle still gain access to hardware.
[edit] Black Hat 2006
The second one was a technique presented by John Heasman, principal security consultant for UK based Next-Generation Security Software at the Black Hat Security Conference (2006), where he showed how to elevate privileges and read physical memory, using malicious procedures that replaced normal ACPI functions stored in flash memory.
[edit] Persistent BIOS Infection
The third one, known as "Persistent BIOS infection", was a method presented in CanSecWest Security Conference (Vancouver, 2009) and SyScan Security Conference (Singapore, 2009) where researchers Anibal Sacco
[7] and Alfredo Ortega, from Core Security Technologies, demonstrated insertion of malicious code into the decompression routines in the BIOS, allowing for nearly full control of the PC at every start-up, even before the operating system is booted.
The proof-of-concept does not exploit a flaw in the BIOS implementation, but only involves the normal BIOS flashing procedures. Thus, it requires physical access to the machine or for the user on the operating system to be root. Despite this, however, researchers underline the profound implications of their discovery: “We can patch a driver to drop a fully working rootkit. We even have a little code that can remove or disable antivirus.”
[8]
[edit] Firmware on adapter cards
A computer system can contain several BIOS firmware chips. The motherboard BIOS typically contains code to access hardware components absolutely necessary for bootstrapping the system, such as the keyboard (either
PS/2 or on a
USB human interface device), and storage (
floppy drives, if available, and IDE or SATA hard disk controllers). In addition, plug-in adapter cards such as
SCSI,
RAID,
Network interface cards, and video boards often include their own BIOS (e.g.
Video BIOS), complementing or replacing the system BIOS code for the given component. (This code is generally referred to as an
option ROM.) Even devices built into the motherboard can behave in this way; their option ROMs can be stored as separate code on the main BIOS flash chip, and upgraded either in tandem with, or separately to, the main BIOS.
An add-in card usually only requires an option ROM if it:
- Needs to be used before the operating system can be loaded (usually this means it is required in the bootstrapping process), and
- Is too sophisticated or specific a device to be handled by the main BIOS
Older
PC operating systems, such as
MS-DOS (including all DOS-based versions of Microsoft Windows), and early-stage bootloaders, may continue to use the BIOS for input and output. However, the restrictions of the BIOS environment means that modern OSes will almost always use their own
device drivers to directly control the hardware. Generally, these device drivers only use BIOS and option ROM calls for very specific (non-performance-critical) tasks, such as preliminary device initialization.
In order to discover memory-mapped option ROMs during the boot process, PC BIOS implementations scan real memory from
0xC0000 to
0xF0000 on 2
KiB boundaries, looking for a ROM
signature:
0xAA55 (0x55 followed by 0xAA, since the
x86 architecture is
little-endian). In a valid expansion ROM, this signature is immediately followed by a single byte indicating the number of 512-byte blocks it occupies in real memory. The next byte contains an offset describing the option ROM's
entry point, to which the BIOS immediately transfers control. At this point, the expansion ROM code takes over, using BIOS services to register
interrupt vectors for use by post-boot applications, provide a user configuration interface, or display diagnostic information.
There are many methods and utilities for examining the contents of various motherboard BIOS and expansion ROMs, such as Microsoft
DEBUG or the UNIX
dd.
[edit] BIOS boot specification
If the expansion ROM wishes to change the way the system boots (such as from a network device or a SCSI adapter for which the BIOS has no driver code), it can use the
BIOS Boot Specification (BBS)
API to register its ability to do so. Once the expansion ROMs have registered using the BBS APIs, the user can select among the available boot options from within the BIOS's user interface. This is why most BBS compliant PC BIOS implementations will not allow the user to enter the BIOS's user interface until the expansion ROMs have finished executing and registering themselves with the BBS API.
[citation needed]
[edit] Changing role of the BIOS
Some
operating systems, for example
MS-DOS, rely on the BIOS to carry out most input/output tasks within the PC.
[9] A variety of technical reasons makes it inefficient for some recent operating systems written for
32-bit CPUs such as
Linux and
Microsoft Windows to invoke the BIOS directly. Larger, more powerful, servers and workstations using
PowerPC or
SPARC CPUs by several manufacturers developed a platform-independent
Open Firmware (IEEE-1275), based on the
Forth programming language. It is included with Sun's SPARC computers, IBM's
RS/6000 line, and other PowerPC
CHRP motherboards. Later x86-based personal computer operating systems, like Windows NT, use their own, native drivers which also makes it much easier to extend support to new hardware, while the BIOS still relies on a legacy 16-bit
real mode runtime interface.
There was a similar transition for the Apple Macintosh, where the system software originally relied heavily on the
ToolBox—a set of drivers and other useful routines stored in ROM based on Motorola's 680x0 CPUs. These Apple ROMs were replaced by Open Firmware in the
PowerPC Macintosh, then
EFI in Intel Macintosh computers.
Later BIOS took on more complex functions, by way of interfaces such as
ACPI; these functions include
power management,
hot swapping, thermal management. However BIOS limitations (16-bit processor mode, only 1 MiB addressable space, PC AT hardware dependencies, etc.) were seen as clearly unacceptable for the newer computer platforms.
Extensible Firmware Interface (EFI) is a specification which replaces the runtime interface of the legacy BIOS. Initially written for the Itanium architecture, EFI is now available for
x86 and
x86-64 platforms; the specification development is driven by The
Unified EFI Forum, an industry
Special Interest Group.
Linux has supported EFI via the
elilo boot loader. The Open Source community increased their effort to develop a replacement for proprietary BIOSes and their future incarnations with an open sourced counterpart through the
coreboot and
OpenBIOS/
Open Firmware projects.
AMD provided product specifications for some chipsets, and
Google is sponsoring the project.
Motherboard manufacturer
Tyan offers
coreboot next to the standard BIOS with their
Opteron line of motherboards.
MSI and
Gigabyte Technology have followed suit with the MSI K9ND MS-9282 and MSI K9SD MS-9185 resp. the M57SLI-S4 models.
Some BIOSes contain a "SLIC", a digital signature placed inside the BIOS by the manufacturer, for example Dell. This SLIC is inserted in the ACPI table and contains no active code. Computer manufacturers that distribute OEM versions of Microsoft Windows and Microsoft application software can use the SLIC to authenticate licensing to the OEM Windows Installation disk and/or system
recovery disc containing Windows software. Systems having a SLIC can be activated with an OEM Product Key, and they verify an XML formatted OEM certificate against the SLIC in the BIOS as a means of self-activating. If a user performs a fresh install of Windows, they will need to have possession of both the OEM key and the digital certificate for their SLIC in order to bypass activation; in practice this is extremely unlikely and hence the only real way this can be achieved is if the user performs a restore using a pre-customised image provided by the OEM.
Recent
Intel processors (P6 and P7) have reprogrammable
microcode. The BIOS may contain patches to the processor code to allow errors in the initial processor code to be fixed, updating the processor microcode each time the system is powered up. Otherwise, an expensive processor swap would be required.
[10] For example, the
Pentium FDIV bug became an expensive fiasco for Intel that required a
product recall because the original Pentium did not have patchable microcode
* Program bootstraper utama yang memungkinkan komputer dapat melakukan proses booting ke dalam sistem operasi yang terpasang.
[sunting] ROM dan NVRAM
BIOS juga sering disebut sebagai ROM BIOS karena pada awalnya BIOS disimpan dalam chip memori hanya baca (ROM) dalam motherboard. Mengapa disimpan di dalam ROM, adalah agar BIOS dapat dieksekusi pada waktu komputer dinyalakan, tanpa harus menunggu untuk menyalakan perangkat media penyipanan terlebih dahulu (yang memakan waktu lama). BIOS dalam komputer PC modern disimpan dalam chip ROM yang dapat ditulisi ulang secara elektrik atau Flash ROM. Karena itulah, sekarang sebutan Flash BIOS lebih populer dibandingkan dengan ROM BIOS. Berikut ini adalah beberapa chip ROM yang digunakan sebagai tempat penyimpanan BIOS. Tipe ROM Cara penulisan Dapat dihapus Jenis BIOS Mask ROM Photolithography Tidak ROM BIOS Programmable ROM (PROM) PROM Writer Tidak ROM BIOS Erasable PROM EPROM/PROM Writer Ya, dengan menggunakan EPROM Rewriter atau menyinarinya dengan sinar ultraviolet tepat pada lubang kuarsa bening. ROM BIOS Electricly EPROM EEPROM/EPROM/PROM Writer Ya, dengan menggunakan EEPROM Rewriter, atau secara langsung secara elektrik dari papan sirkuit dengan menggunakan perangkat lunak EEPROM Programmer. ROM BIOS Flash ROM EEPROM Writer atau software yang dapat menulisi Flash ROM Ya, dengan menggunakan EEPROM Writer, atau langsung secara elektrik dari papan sirkuit dengan menggunakan perangkat lunak Flash BIOS Programmer. Flash BIOS Tampilan yang dikeluarkan oleh BIOS saat NVRAM mengalami kerusakan atau saat baterai litium CR-2032 habis dayanya atau dicabut dari slotnya
Meskipun BIOS disimpan dalam memori hanya baca, konfigurasi BIOS tidak disimpan dalam ROM, (hal ini disebabkan oleh sifat ROM yang statis) melainkan sebuah chip terpisah yang disebut sebagai Real-time clock (RTC), yang berupa sebuah Non-Volatile Random Access Memory (NVRAM). NVRAM juga sering disebut sebagai Complimentary Metal-Oxide Random Access Memory (CMOS RAM), karena menggunakan metode pembuatan CMOS. Karena menggunakan metode pembuatan CMOS, NVRAM membutuhkan daya yang sangat kecil agar dapat bekerja. Meskipun disebut non-volatile, NVRAM sebenarnya merupakan sebuah chip yang volatile, sehingga data yang tersimpan di dalamnya dapat terhapus dengan mudah jika daya listrik yang menghidupinya terputus. Oleh karena itu, NVRAM "dihidupi" oleh sebuah baterai (mirip baterai kalkulator atau jam) dengan bahan Litium dengan seri CR-2032. Sebuah baterai Litium CR-2032 dapat menghidupi NVRAM selama tiga hingga lima tahun. Jika daya dalam baterai habis, atau daya yang disuplainya terputus (akibat dicabut dari slotnya), maka semua konfigurasi akan dikembalikan ke kondisi standar, sesuai ketika BIOS tersebut diprogram oleh pabrikan. BIOS umumnya memberikan laporan CMOS Checksum Error atau NVRAM Checksum Error.
BIOS kadang-kadang juga disebut sebagai
firmware karena merupakan sebuah
perangkat lunak yang disimpan dalam
media penyimpanan yang bersifat hanya-baca. Hal ini benar adanya, karena memang sebelum tahun 1995, BIOS selalu disimpan dalam media penyimpanan yang tidak dapat diubah. Seiring dengan semakin kompleksnya sebuah sistem komputer , maka BIOS pun kemudian disimpan dalam
EEPROM atau
Flash memory yang dapat diubah oleh pengguna, sehingga dapat di-
upgrade (untuk mendukung prosesor yang baru muncul, adanya
bug yang mengganggu kinerja atau alasan lainnya). Meskipun demikian, proses
update BIOS yang tidak benar (akibat dieksekusi secara tidak benar atau ada hal yang mengganggu saat proses
upgrade dilaksanakan) dapat mengakibatkan
motherboard mati mendadak, sehingga komputer pun tidak dapat digunakan karena perangkat yang mampu melakukan
proses booting (BIOS) sudah tidak ada atau mengalami kerusakan.
Oleh karena itu, untuk menghindari kerusakan (korupsi) terhadap BIOS, beberapa
motherboard memiliki BIOS cadangan . Selain itu, kebanyakan BIOS juga memiliki sebuah region dalam EEPROM/Flash memory yang tidak dapat di-
upgrade, yang disebut sebagai "
Boot Block".
Boot block selalu dieksekusi pertama kali pada saat komputer dinyalakan. Kode ini dapat melakukan verifikasi terhadap BIOS, bahwa kode BIOS keseluruhan masih berada dalam keadaan baik-baik saja (dengan menggunakan metode pengecekan kesalahan seperti
checksum,
CRC,
hash dan lainnya) sebelum mengeksekusi BIOS. Jika
boot block mendeteksi bahwa BIOS ternyata rusak, maka
boot block akan meminta pengguna untuk melakukan pemrograman BIOS kembali dengan menggunakan
floppy disk yang berisi program
flash memory programmer dan
image BIOS yang sama atau lebih baik. Pembuat
motherboard sering merilis update BIOS untuk menambah kemampuan produk mereka atau menghilangkan beberapa bug yang mengganggu


